
Quick Summary: What To Do After Registration?
After booking your GAMCA medical appointment, print your official confirmation slip immediately to verify your passport details and assigned clinic. Next, prepare your original passport, visa copies, and photos. Visit the assigned clinic within thirty days, complete your physical tests, and monitor your online medical fitness status for your work visa approval.
You just submitted your online application form and paid the booking fee. Now, an unexpected sense of nervousness kicks in as you look at your screen. Many applicants feel completely lost once the confirmation page appears. Getting a confirmed GAMCA medical appointment marks an exciting milestone for your Gulf career, yet simple post-booking oversights can quickly delay your travel plans.
Securing a spot is only the first step in your emigration medical clearance. Thousands of Gulf-bound workers travel abroad every month to work across Saudi Arabia, the UAE, Kuwait, Oman, Qatar, and Bahrain. Minor clerical errors or missing documents can cause real headaches at the clinic entrance. Understanding your post-registration tasks ensures a smooth, stress-free clinic visit.
Why Post-Registration Verification Protects Your GCC Visa
Booking data from early 2026 indicates that nearly 18 percent of clinic delays stem from basic clerical mismatches on appointment slips. A single misspelled surname, an inverted birth digit, or an incorrect passport number will invalidate your appointment slip on arrival. Authorized clinics must reject mismatched paperwork to comply with Gulf Health Council security protocols.
The GCC health network links medical records directly to foreign labor ministries. As a result, unauthorized clinics cannot conduct these tests or change your digital booking details. Reviewing your generated paperwork immediately saves you from costly re-registration fees and painful travel delays. Knowing what happens after GAMCA medical registration helps you spot errors early while clinic administrators can still correct them.
A routine GCC medical appointment follows strict verification checkpoints before testing begins. Clinic intake desks match your digital token against central biometric databases. If your physical passport diverges from your appointment voucher, technicians must stop the intake process immediately. Careful verification protects your investment and keeps your employment timeline moving.
Traditional Clinic Visits Versus The Modern GAMCA System
Navigating medical clearances today requires following automated digital pathways rather than old walk-in methods. The table below details how the standardized digital workflow improves security and transparency for applicants.
Process Milestone | Old Manual Clearance | Modern Centralized System | Applicant Advantage |
|---|---|---|---|
Clinic Allocation | Random walk-ins with long clinic queues | Automated assignment to licensed centers | Guaranteed testing slot and zero queue guessing |
Identity Verification | Manual paper checks at the front reception | Biometric matching via central GCC databases | Total protection against identity fraud |
Document Tracking | Physical paper stamps carried between desks | Direct digital uploads to embassy portals | Real-time tracking without lost paperwork |
Validity Monitoring | Uncertain expiry dates written by hand | Fixed thirty-day appointment eligibility windows | Clear deadlines that protect your visa progress |
Status Transparency | In-person clinic visits to collect reports | Central online verification within 72 hours | Instant confirmation from home or office |
Critical Document Preparation Checklist
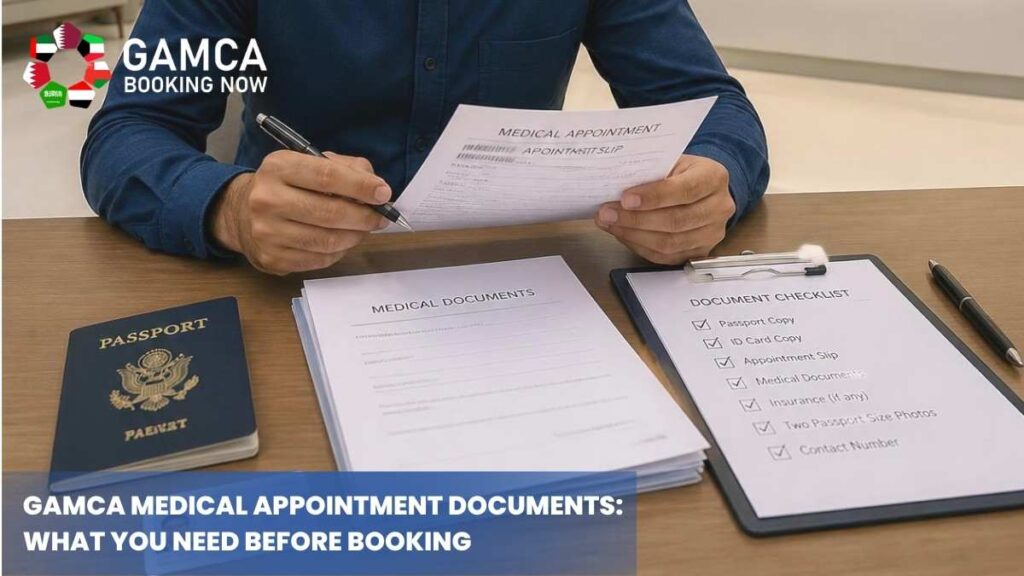
Arriving at your assigned center without complete documentation creates avoidable delays. Gather these vital items into a clean file folder before your travel date:
- Original International Passport: Carry your physical passport with at least six months of remaining validity. The clinic desk will inspect the physical book alongside your digital slip.
- Printed Medical Registration Slip: Keep two clear physical printouts showing your barcode, candidate registration number, and assigned center details. Digital copies on smartphones are not accepted at security checkpoints.
- Recent Passport Photographs: Prepare four white-background color photographs matching GCC consular dimensions. Write your full name and passport number lightly on the reverse side of each photo.
- National Identity Copies: Bring two photocopies of your national identity card and your initial visa deposit or employment agency slip. Clinics maintain physical copies for their permanent medical records.
Five Crucial Steps Following Your Registration
Completing your clinic screening without issues demands organized preparation. Follow this tested, step-by-step sequence as soon as your booking confirmation is generated.
Inspect Your Appointment Voucher For Detail Errors
Download the generated PDF slip and check every printed line against your passport. Ensure your nationality, profession, passport number, and date of birth match your travel document.
Practitioner Insight: In our daily processing desk reviews, catching a transposed passport digit within the first hour prevents full cancellation penalties.
Locate Your Assigned Medical Center And Confirm Operating Hours
Review the clinic address printed on your voucher. The system automatically assigns applicants to GAMCA Approved Medical Examination Centres to prevent doctor bias and keep wait times balanced.
Practitioner Insight: Always call the assigned center a day ahead to confirm intake hours, as diagnostic centers close registration desks earlier than general outpatient wards.
Complete Essential Physical Preparation Before Your Visit
Drink plenty of water and rest well for two days before your scheduled appointment. Avoid sugary snacks, heavy caffeine, and unprescribed cold medications before your morning tests, as these temporarily skew urine and blood readings.
Practitioner Insight: We routinely advise candidates to pause high-sodium energy drinks, which cause temporary spikes in blood pressure at the screening desk.
Complete Intake And Clinical Testing Stages
Arrive at the medical facility early in the morning with your original documents and testing slip. Staff will take your digital fingerprints, collect blood and urine samples, take a chest X-ray, and run a quick vision test.
Practitioner Insight: Stand completely still and follow the breathing cues during your chest radiography to avoid blurry film artifacts that require re-tests.
Monitor Your Centralized Medical Report Status Online
Return home and track your results using your passport number and nationality code. The laboratory uploads your findings directly to the shared GCC immigration network within 2 to 4 business days. Practitioner Insight: Avoid returning to the clinic in person for updates; the central database updates as soon as the chief pathologist signs it.
Real-World Scenarios: Navigating Clinic Day Challenges
Resolving Name Discrepancies Before Departure
An electrical technician named Ramesh booked his screening in a rush before starting a commercial contract in Riyadh. He accidentally entered his passport expiry year as 2028 instead of 2029 during checkout. He realized his mistake while printing his confirmation voucher at a local print shop that evening.
Instead of showing up at the clinic with bad paperwork, he requested a data correction through his portal support desk. The support team adjusted the record and issued a refreshed appointment token within hours. Ramesh presented the corrected voucher at the counter the following morning, completed his diagnostic panels easily, and received his digital fit certificate three days later.
Managing Borderline Blood Pressure Readings
A logistics supervisor named David arrived at his assigned medical center following an exhausting four-hour bus journey in the summer heat. His initial intake check showed an elevated blood pressure reading of 145/95. The intake nurse paused the screening and warned him that unresolved hypertension causes testing delays.
David showed his appointment slip to the supervisor, stepped into the waiting lounge, and rested quietly with water for forty minutes. The clinic technician retook his pressure in a calm room, recording a normal reading of 122/80. His blood draws and chest imaging proceeded normally, and his official clearance arrived within forty-eight hours without requiring expensive specialist referrals.
What To Expect Inside The Clinic
Medical screening runs through a streamlined series of specialized testing stations. Knowing what happens inside helps you stay relaxed throughout the visit.
- Reception Biometrics: Attendants scan your original passport barcode and capture digital thumbprints. This step ensures that the person taking the test matches the official visa applicant.
- Clinical Pathology Laboratory: Technicians draw blood samples to screen for infectious diseases such as HIV, hepatitis B, hepatitis C, and syphilis. Urine specimens are used to evaluate kidney function, blood sugar levels, and traces of substances.
- Radiology Department: A specialized technician takes a posterior-anterior chest X-ray to screen for active or scarred pulmonary tuberculosis. Remove all necklaces and metal buttons before entering the imaging room.
- General Physical Examination: A physician checks your resting pulse, blood pressure, eyesight, hearing, and physical mobility. They also look for surgical scars and ask about past medical conditions.
Vital Pre-Visit Health Precautions
A successful clinic assessment depends on your physical baseline on the day of testing. Small habits directly influence your test results.
- Maintain Hydration Levels: Drink clean water steadily throughout the day before your visit. Good hydration clears routine cellular waste from your urinary tract and makes blood collection quick.
- Declare Maintenance Medications: Tell the intake physician about any ongoing prescriptions for conditions like diabetes or mild hypertension. Bring your formal doctor prescriptions and diagnostic slips along for verification.
- Avoid Intense Physical Exertion: Skip heavy weightlifting or exhausting manual labor for twenty-four hours before testing. Strenuous muscle breakdown raises serum creatinine levels and can prompt unnecessary kidney re-tests.
- Dress For Quick Medical Access: Wear comfortable, loose-fitting two-piece clothing with short sleeves. This helps nurses draw blood and place blood pressure cuffs without delays.
If you have not yet scheduled your screening session, secure your appointment through our streamlined portal to Book Your GAMCA Medical Appointment at an accredited facility near you.
Frequently Asked Questions
No, applicants cannot change their assigned clinic after the system issues the confirmation slip. The central regulatory portal automatically assigns candidates to accredited facilities to distribute workload evenly and prevent partiality. Trying to book a second appointment while your initial slip remains active will cause duplicate payment errors and system locks. You must attend the assigned clinic before the slip expires, or wait until the 30-day validity window closes before booking again.
Contact your booking support desk immediately if you discover spelling mistakes, incorrect dates of birth, or mismatched passport digits. Minor typographical corrections can often be updated in the system before your clinic visit. Do not show up at the diagnostic center with incorrect paperwork. Clinic receptionists must reject mismatched paperwork, which forces you to pay for a replacement voucher.
Your medical appointment slip remains valid for 30 days from the date it was generated. You can complete your physical examination on any working business day during this period. However, visiting the clinic within the first seven days is best. Early visits give you plenty of time to resolve any requested re-tests before your employment visa deadlines pass.
An unfit result means that laboratory or radiology tests detected an active communicable condition or severe chronic disorder barred under Gulf Health Council guidelines. If your test returns an unfit status, the medical center logs the result into the centralized immigration database. You must wait out the mandatory restriction period and complete treatment before becoming eligible for re-examination.
Most accredited examination centers publish your digital test results within two to four business days after your visit. The laboratory team analyzes your blood samples, reviews the chest X-rays, and uploads the verified files directly to the centralized database. You can review and print your approved medical fitness certificate online using your passport details from home.
Stepping Forward With Confidence
Completing your medical requirements brings you one step closer to your Gulf employment goals. The process is straightforward when you handle your paperwork carefully, prepare your body properly, and follow clinic guidelines. Review your printed slip, gather your physical documents, and visit your designated clinic early in the morning. Thousands of workers complete this screening every month without any trouble, and you can do the same.
If you are just beginning your travel preparations, complete your GAMCA medical registration online to lock in your preferred city. Stay organized, follow the checklist, and complete your journey toward a rewarding career abroad.